
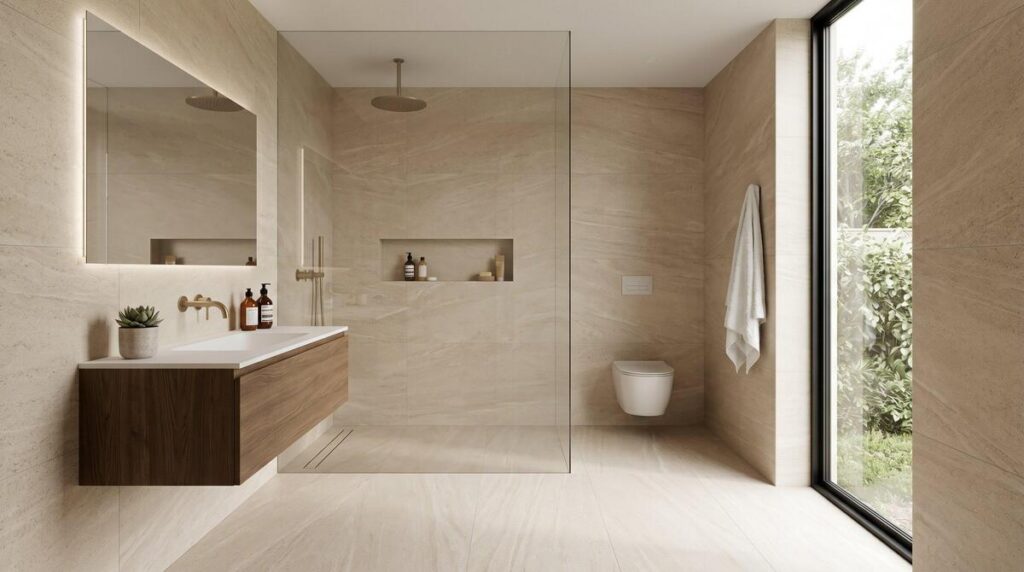
Bathroom remodeling is moving beyond traditional accent walls and decorative backsplashes. One of the most noticeable design trends in 2026 is tile drenching, an approach that uses coordinated tiles across multiple surfaces to create a continuous, luxurious appearance. Instead of limiting tiles to shower enclosures or floors, homeowners are extending them across entire walls, around vanities, and sometimes onto ceilings.
This design approach combines visual appeal with practical benefits. Properly selected and installed tiles can create durable, easy-to-clean surfaces while helping protect moisture-exposed areas. Whether you are planning a complete bathroom renovation or updating an existing shower, tile drenching offers an opportunity to create a cohesive and personalized interior.
What Is Tile Drenching?
Tile drenching is a bathroom design technique that extends the same tile, color palette, or complementary tile materials across several surfaces. Rather than treating the floor, shower, and walls as separate design elements, the approach makes them feel like parts of one continuous space.
Some homeowners prefer using one large-format porcelain tile throughout the room. Others combine different tile sizes while maintaining consistent colors and finishes. A more dramatic design might extend decorative tiles from the floor to the walls and even the ceiling of a shower enclosure.
According to Better Homes & Gardens’ coverage of the tile-drenching trend, designers are exploring this approach through combinations of natural stone, porcelain, handmade-look ceramics, and coordinated finishes.
Why Tile Drenching Is Trending in 2026
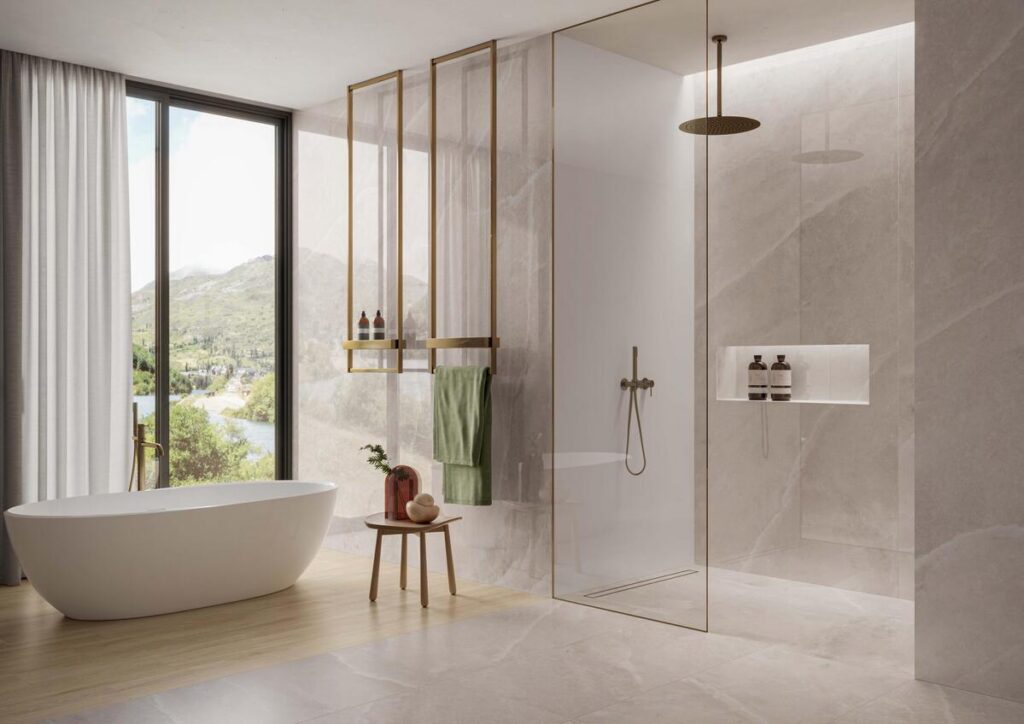
Homeowners are increasingly interested in bathrooms that feel more personalized, comfortable, and luxurious. Tile drenching addresses these preferences by creating a unified appearance without requiring complicated decorative elements.
The trend also works with several popular bathroom design directions, including minimalist interiors, spa-inspired spaces, natural materials, and contemporary luxury renovations.
The National Association of REALTORS’ coverage of tile drenching identifies the growing interest in extending tile across multiple surfaces as a notable home design development in 2026.
Several advantages make the approach appealing:
- Visual continuity: Matching surfaces can make a bathroom feel more organized and cohesive.
- Timeless design potential: Natural stone colors and understated patterns can remain attractive beyond short-lived trends.
- Easy maintenance: Appropriate tile surfaces are generally easier to clean than many painted or unfinished materials.
- Design flexibility: Homeowners can experiment with textures, patterns, tile sizes, and finishes.
- Moisture protection: Properly installed tiled assemblies can protect vulnerable surfaces when combined with appropriate waterproofing.
Choose the Right Tile Material
Material selection is one of the most important decisions in a tile-drenched bathroom. The material affects appearance, durability, maintenance, installation requirements, and overall project cost.
1. Large-Format Porcelain Tiles
Large-format porcelain is a popular choice for modern bathrooms. Its size creates fewer visible grout joints, resulting in a cleaner and more continuous appearance.
Porcelain is also available in designs that resemble marble, limestone, concrete, and other natural materials. This allows homeowners to achieve a high-end appearance while choosing a manufactured surface with consistent characteristics.
However, large-format tiles require properly prepared substrates, appropriate setting materials, and experienced installation. Uneven surfaces can create lippage and alignment problems that become especially noticeable across large walls.
2. Natural Stone Tiles
Natural stone offers unique patterns and textures that can make a bathroom feel more sophisticated. Marble, travertine, limestone, and other stone varieties provide distinctive appearances that manufactured products may not completely reproduce.
Stone selection requires additional consideration because different materials have different absorption rates, maintenance requirements, and sensitivities to cleaning products.
The Natural Stone Institute’s stone care guidance explains that some stones benefit from appropriate impregnating treatments, although sealing does not make natural stone completely stain-proof. Always follow the recommendations for the specific material.
3. Handmade and Zellige-Style Tiles
Handmade-look ceramic tiles and zellige-inspired finishes introduce texture, subtle color variation, and visual depth. Their irregular surfaces can add character to bathrooms that would otherwise feel overly uniform.
These materials work particularly well as feature surfaces, shower walls, recessed niches, or vanity backdrops. They can also be incorporated into a fully drenched bathroom when the overall color palette remains coordinated.
Extend Tiles Across Walls, Floors, and Ceilings
The defining feature of tile drenching is the way materials continue across different surfaces. However, not every bathroom needs identical tiles everywhere. The best approach depends on the room’s dimensions, natural lighting, layout, and intended appearance.
Floor-to-Wall Continuity
Using complementary tiles across floors and walls can create a more expansive appearance. This works especially well in smaller bathrooms where too many contrasting finishes can make the room feel visually divided.
Fully Tiled Shower Areas
Extending tile across shower walls, floors, and recessed storage niches creates a cohesive wet-area design. Coordinating the drain, fixtures, grout, and shower hardware helps maintain the overall appearance.
Ceiling Tile Applications
Taking tile onto the ceiling can create a dramatic, enclosed spa-like atmosphere. This application requires careful planning because overhead tiles need a suitable substrate, compatible setting materials, and secure installation.
For bathrooms with steam exposure or consistently high humidity, the ceiling assembly must also be designed to manage moisture appropriately.
Select Colors That Work Together
Color selection can determine whether a tile-drenched bathroom feels calming or overwhelming. Many homeowners prefer warm neutrals, including beige, cream, taupe, and natural stone shades. These colors create a comfortable background for wood vanities, brushed metal fixtures, and soft lighting.
Other options include muted greens, earthy terracotta, warm gray, and deeper natural tones. These colors can introduce personality while maintaining a coordinated appearance.
Consider these design combinations:
- Warm minimalism: Beige porcelain, light wood cabinetry, and brushed brass fixtures.
- Natural spa design: Limestone-inspired tiles, neutral stone surfaces, and soft lighting.
- Modern contrast: Dark stone-look tiles, matte black fixtures, and warm wood accents.
- Artisanal character: Handmade-look ceramic tiles, textured finishes, and natural materials.
Before purchasing materials, compare physical samples under the bathroom’s actual lighting. Tile colors can appear different under daylight, warm LED lighting, and bathroom mirrors.
Waterproofing Is More Important Than the Tile
One of the biggest misconceptions about tile drenching is that tiled surfaces automatically make a bathroom waterproof. Tiles and grout are not substitutes for a properly designed waterproofing system.
Behind the finished surface, the shower and other wet areas need suitable waterproof membranes, correctly treated corners, sealed penetrations, and properly detailed drains. The substrate must also meet the requirements of the selected installation system.
The Schluter Systems guide to water management in tiled showers explains how waterproofing assemblies help manage moisture and protect surrounding building materials.
The Tile Council of North America’s ANSI standards also provide references for tile installation, waterproof membranes, substrates, and grout materials.
For this reason, waterproofing should be planned before tiles are installed, not treated as an additional step after the decorative work is complete.
Choose Safe Flooring and Appropriate Grout
Bathroom floors require more attention than decorative walls because they are regularly exposed to water. A beautiful tile can still create a safety concern if its finish becomes slippery when wet.
Consider matte, textured, or otherwise suitable slip-resistant products for shower floors and frequently wet walking areas. Review manufacturer testing information and intended-use recommendations before choosing a tile.
The ANSI A326.3 testing reference provides information about measuring the dynamic coefficient of friction of hard-surface flooring. Product suitability should be evaluated using the relevant test data and actual installation conditions.
Grout selection matters too. Choose a product compatible with the tile material, joint width, exposure conditions, and waterproofing system. Larger tiles can reduce the number of grout joints, but smaller-format tiles may be more practical for curved surfaces and shower floors.
Plan Ventilation and Moisture Control
Even a beautifully tiled bathroom needs effective ventilation. Daily showers introduce moisture into the air, and inadequate ventilation can contribute to condensation, mildew, and deterioration of surrounding building components.
The U.S. Environmental Protection Agency’s bathroom remodeling guidance recommends checking that exhaust fans operate properly and discharge air directly outdoors.
During remodeling, inspect existing ventilation ducts, plumbing connections, and concealed areas for signs of moisture problems. A new tile installation should never be used to cover an unresolved leak or damp substrate.
For additional information, WSC’s article on understanding mold remediation explains how moisture problems can contribute to mold growth and why proper moisture control matters.
Understand the Cost and Installation Requirements
Tile drenching can require more material and installation time than a conventional bathroom renovation. The final budget depends on room dimensions, tile selection, surface preparation, waterproofing, ceiling applications, plumbing changes, and the complexity of the layout.
Large-format tiles may require specialized handling and precise cutting. Handmade tiles can involve additional layout work because their dimensions and surface variations may differ. Natural stone may also require specific installation and maintenance procedures.
Before construction begins, request a detailed estimate that separates material costs, surface preparation, waterproofing, tile installation, grout, fixtures, and finishing work.
How to Plan a Successful Tile-Drenching Remodel
A successful project starts with a clear design and a properly coordinated construction plan.
- Measure the bathroom: Identify wall dimensions, floor area, shower placement, and ceiling height.
- Choose the tile palette: Select complementary colors, sizes, textures, and finishes.
- Plan the layout: Determine how tiles will align around corners, windows, doors, niches, and fixtures.
- Specify waterproofing: Select an appropriate system and follow its installation requirements.
- Review ventilation: Make sure the bathroom can remove excess moisture effectively.
- Confirm floor safety: Select suitable finishes for wet and frequently used areas.
- Hire experienced installers: Review completed projects, qualifications, references, and written estimates.
If you are preparing for a complete bathroom renovation, WSC’s guide on choosing the right construction company offers additional advice on evaluating contractors and planning construction work.
Conclusion
Tile drenching is more than a decorative bathroom trend. It offers homeowners an opportunity to combine coordinated materials, durable surfaces, and thoughtful design into one cohesive remodeling project.
From large-format porcelain and natural stone to handmade-look ceramics, there are many ways to create a distinctive tiled interior. However, the most successful results depend on more than appearance. Proper waterproofing, suitable floor finishes, compatible installation materials, and effective ventilation are essential considerations.
Whether you prefer a minimalist spa-inspired bathroom or a more expressive design with textured surfaces, thoughtful planning can help create a beautiful and functional space. With the right materials and professional installation, a tile-drenched bathroom can remain attractive and practical for years to come.